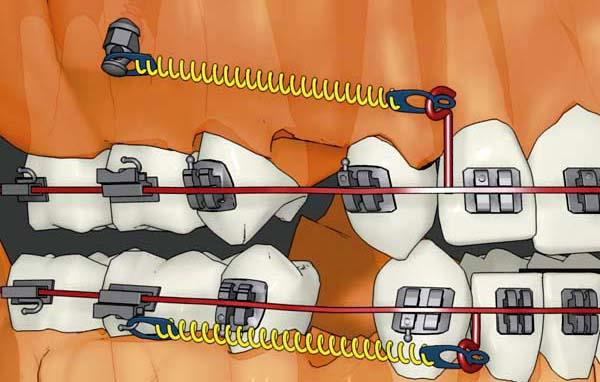
Dental Implants have taken the dental world by storm since they were introduced, as they opened up multiple possibilities which were not feasible before. In the orthodontic field too Micro-implants or TAD’s are small screw like attachments, getting popular by the day to provide stable anchorage.
Whenever a tooth movement has to occur it has to take support from either the adjacent teeth or the surrounding bone which is known as anchorage. It is obvious that bony anchorage will be much more stable and stronger than tooth anchorage. The micro-implants are tiny screw like devices superficially inserted into the outermost layer of the bone to help us use bony anchorage to carry out effective tooth movement. With the help of these tiny miracles we can carry out very complex orthodontic movements and even avoid jaw surgery in some cases.
When do Orthodontists recommend micro-implants:
- To correct gummy smile
- To bring about jaw changes in adults in borderline surgical cases
- When there are insufficient teeth to provide the necessary support for movement
- To intrude or upright a tooth to proper position
- As a part of other appliances like expanders or facemask
Parts of a Microimplant:
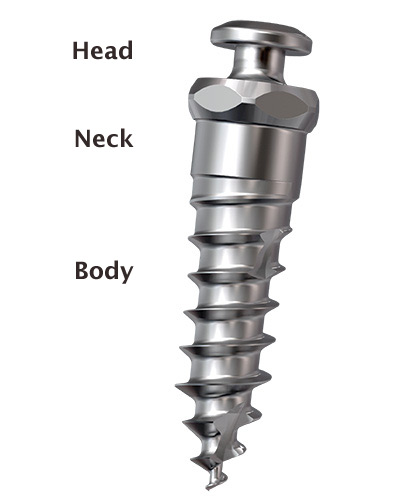
Orthodontic implants are roughly 6-8mm in length and 1.2 to 2.3 mm in diameter. This thickness is similar to that of a toothpick.
As with other implants microimplants have three parts:
- Head- this part is mainly designed to receive attachments like elastics or wires
- Neck – the connecting part between head and body
- Body – the part which is in inserted to contact the bone.
Unlike normal implants the microimplants do no integrate with our bone hence there’s minimal pain while we put or remove the implant
Steps to put an implant:
- Once your case is assessed for micro-implants the orthodontist or oral surgeon will take a small X-ray called IOPA to check your roots and locate the placement of implant.
- After that anesthesia will be applied topically or sprayed just before inserting the implant.
- The implant is then carefully screwed into the bone with clockwise motions. When the implant is being screwed a minimal pressure will be felt. Any pain felt at this point should be elicited.
You should be comfortable immediately after placing the implant. No restriction on any daily activities is recommended
After care:
The area around the implant requires proper cleaning. Apply Chlorhexidine gel for healing and do some salt water rinses. If the area gets infected, shows yellowish discharge or the implant is moving consult your dentist for antibiotics.